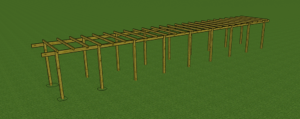
Equipment:
- 100 mm by 100 mm notched posts (4 inches by 4 inches)
- 150 mm by 50 mm sawn and preservative treated timber (6 inches by 2 inches)
- 100 mm by 50 mm sawn and preservative treated timber (4 inches by 2 inches)
- String lines
- Timber pegs or steel pins
- 10 mm dowel or M10 coach bolts
- A pair of sawhorses or similar to rest the post on
- Handsaw
- Carpenter’s or combination square
- Pencil
- Tape measure
- Drill
- Large wood bit (about 20 mm or ¾ inches)
- Sharp wood chisel and a hammer
- Concrete or post mix
- Tile lathe or scrap timber for bracing
- Large square
- Spade
- Assorted nails
- Spirit level
Summary:
- Check the site is level.
- Set up a parallel pair of lines the width of the pergola apart.
- Set up a line at 90° to these to mark the start of the pergola.
- Dig a pair of post holes where the lines cross.
- Prepare the post with a notch to take the top.
- Place the post in the first hole so that it is vertical and is next to the lines where they cross.
- Brace the post in place.
- Repeat steps 5 to 7 for the second post.
- Measure along the parallel lines to the place for the second pair of posts.
- Dig the post holes and repeat steps 5 to 8.
- Cut the first 2 horizontal beams to length and put them in the post notches.
- Secure the horizontals with 2 dowels or coach bolts through the posts.
- Fix the rafters above each pair of posts
- Re-check!
- Concrete the posts in place.
- Prepare your next pair of horizontals.
- Use them to check the place for the next pair of post holes and dig them.
- Set up the posts and horizontals and connect them with a rafter.
- Check the horizontals and rafters are level and the posts vertical.
- Concrete the posts in place.
- Repeat for the length of the pergola.
- Once you reach the end go back and put any intermediate posts and rafters in and check all the fixings are secure.
- Check the site is level.
It is very easy to be fooled into thinking an area is level when you look at it, but once you start building the pergola if the ground slopes you will soon find out and you can quickly find yourself in trouble. Carefully check using a level of some sort, a spirit level and a straight bit of wood will do, and then you can make allowance in your design. If needs be you can incorporate a step or steps into the top of the pergola. The important thing is to make sure that any part of the pergola you are going to walk over has sufficient head room. As a rule, you need 7.1 metres the surface you are walking on and the bottom of whatever you are walking under. Less and you will be fighting the urge to duck as you walk. Also work out how you are going to space out the post, sawn timber comes standard lengths and careful planning at this stage can prevent a lot of wastage.
- Set up a parallel pair of lines the width of the pergola apart.
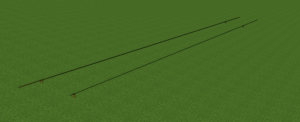
Decide how wide you what the inside of the pergola to be, remember if you are going to grow plants up the sides they are quickly going to encroach into the space inside the pergola. Also consider how wide it needs to be to feel comfortable as you walk down inside. Once you are happy with the width, set out two lines that mark the inside edges of the pergola and walk down it to check the width works and that the position is what you want.
- Set up a line at 90° to these to mark the start of the pergola.
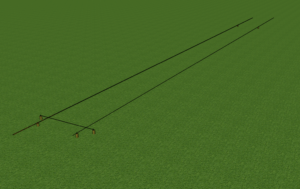
Chose where you are going to start the pergola and set up a line across the first two lines. Check this is at 90° to the first two with a large square and double check the first two lines are parallel.
- Dig a pair of post holes where the lines cross.
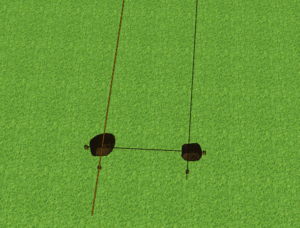
The two points the lines cross mark the inside corner of the first two posts. Dig holes for each of the posts making sure the posts will sit next to the lines but not pushing them out of line. The holes need to be at least 600 mm deep but no wider than necessary. You will need to pull the lines a little to the side while you dig the holes otherwise you will end up snapping the line. Just make sure to check the lines are still taught once you’ve finish digging the holes.
- Prepare the post with a notch to take the top.
Prepare the first two posts by making notches in their tops as shown in the post “How to notch the top of a post to take a 150 mm horizontal beam” .
- Place the post in the first hole so that it is vertical and is next to the lines where they cross.
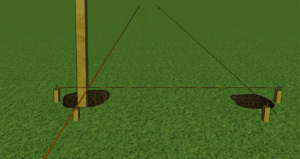
The post must be vertical and next to but not actually touching the two lines so that they do not push the line out of line. Make sure the notches on the top of the post line up along the length of the pergola to take the horizontals. Also the post needs to be set so the bottom of the notch is same height as you want the underside of the horizontals to be. To make this easier fix a piece of scrap wood across the post at the ground level to support it. This stage is probably the hardest but if you don’t get it dead right you will never get the pergola right. So take your time and draft in any extra help you can.
- Brace the post in place.
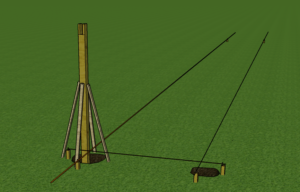
Once you are happy brace the post in place with so bits of scrap wood. Make sure the post can’t move when you start placing the concrete around it. Once you start concreting in the post in if it moves you are going to have to take everything apart and dig the concrete back out as you will not be able to push it back in line.
- Repeat steps 5 to 7 for the second post.
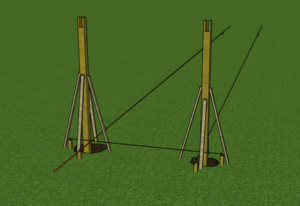
Set up the other one of the first pair of posts and keep checking all the time to make sure the posts are vertical in both directions, the correct height and the correct distance apart. The pergola’s success will depend on how well you do this part as the rest of it builds off these posts.
- Measure along the parallel lines to the place for the second pair of posts.
Take care to avoid confusing the internal gap between posts and the spacing between the centres of the posts. Make sure you are on the same side of the line as the first posts.
- Dig the post holes and repeat steps 5 to 8.
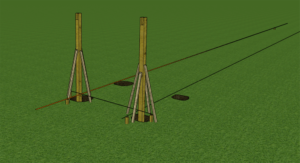
Now dig the post holes, being careful not to damage the lines, and repeat the steps from 5 to 8 inclusive.
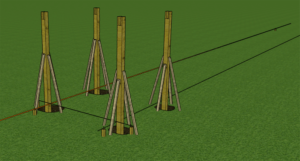
- Cut the first 2 horizontal beams to length and put them in the post notches.
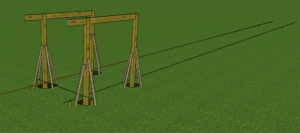
The length horizontal should be the distance between the centres of the posts, half the width of the post plus any overhang, say 300 to 400 mm.
- Secure the horizontals with 2 dowels or coach bolts through the posts.
Place the horizontals in the notches so the ends are at the centre of the second pair of posts and secure them with two 10 mm bolts or dowels. Secure the horizontals to the first posts with another pair of bolts/dowels.
- Fix the rafters above each pair of posts
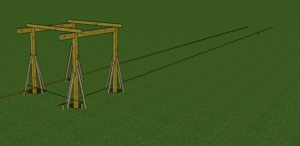
Fix a rafter cross each pair of posts using a 150 mm nail or landscaping screw. If using a nail pre-drill a hole for the nail through the rafter. This helps to keep the nail straight and makes it easier to drive in. This braces the two rows of posts. Make sure the posts are perfectly vertical before fixing the rafters. Typically, the rafters will over hang the outside of the posts by 300 or 400 mm.
- Re-check!
Go back and check everything that should be vertical is and anything that should be horizontal is. If it isn’t; do something about it! If you start with everything plumb and square is straight forward to keep it right, if you start out wrong you will NEVER get it right. Small errors can be corrected by adjusting the horizontals and rafters but if all else fails you may have to take a post down and redo it. This may seem drastic, but the alternative is it looking a mess for years to come.
- Concrete the posts in place.
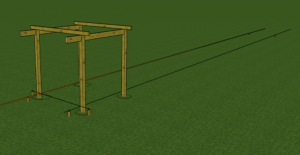
Once you’re absolutely sure that everything is correct, this is no time for near enough, concrete in the first four posts. Don’t just chuck the concrete in! 40 or 50 kg of wet concrete landing on the side of a post, regardless of how well the post is braced, will move the post out of line. Place it a shovel full at a time around the post, checking as you go, and packing it round the post with a piece scrap wood or similar. The concrete can be mixed in the conventional way or one of the bagged post mix can be used. The former is cheaper but you need to leave it over night to develop sufficient strength, the latter is a lot easier to use and quicker as the concrete will have developed sufficient strength in minutes.
- Prepare your next pair of horizontals.
You should be able to get a horizontal to span two pair of posts so the length should be twice the distance between centres two posts.
- Use them to check the place for the next pair of post holes and dig them.
You can now use these to measure out the position of the next posts and dig the holes for them.
- Set up the posts and horizontals and connect them with a rafter.
Assemble this pair of posts, horizontals and rafters which will help to make sure everything is correctly braced and spaced.
- Check the horizontals and rafters are level and the posts vertical.
Make sure everything is horizontal, vertical, square and correctly spaced. If you don’t keep everything right you will end up in trouble.
- Concrete the posts in place.
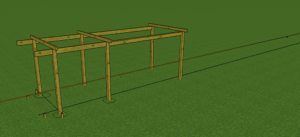
Once you’re happy everything is correct carefully concrete in these post like the ones before.
- Repeat for the length of the pergola.
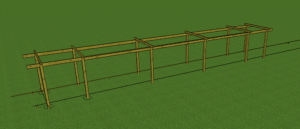
Now you just keep repeating the steps 16 to 20 until you reach the end of the pergola. Just keep checking that you’re keeping everything horizontal, vertical, square and correctly spaced. It’s a good idea to keep going back and checking what you’ve already done and take you time, don’t rush it.
- Once you reach the end go back and put any intermediate posts and rafters in and check all the fixings are secure.
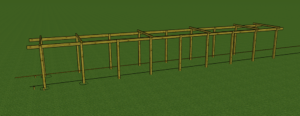
Once you’ve got the basic structure up you can go back and fill in any intermediate posts and rafters and check all the fixings are secure.
